During the course of this tutorial we will be learning about
alpha channels in Photoshop and how they relate to skinning Winamp
3. If you are new to Photoshop, this should help you. But I suggest
that you search the internet for tutorials on Photoshop and learn
all that you can. It's a fun and powerful program, but also very
confusing and difficult to use at times. It takes years to master
and lots of practice to get realistic effects.
Filters/tools and actions that we will be using in this tutorial are.
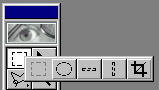
Marquee Tool
Paint Bucket
Garrison Blur <-- Filter/Blur/Garrison Blur
Levels <-- Image/Adjust/Levels
Heres an animation of the steps I take to create a background.
 In the animation above, You can see the use of the marquee tool.
Then I create an alpha channel, Fill it with white, Garrison blur,
Adjust levels, Set channel as selection and fill.
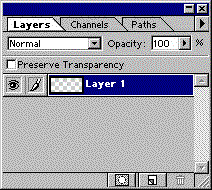
Let me introduce you to the channels pallet and tools I used to
create the background above.
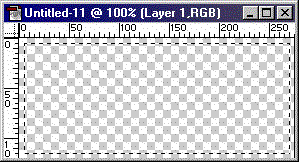
We are going to start by making a new image. I'm going to keep mine
small for the sake of this tutorial. I made a new image 275x120 pixels.
In the animation above, You can see the use of the marquee tool.
Then I create an alpha channel, Fill it with white, Garrison blur,
Adjust levels, Set channel as selection and fill.
Let me introduce you to the channels pallet and tools I used to
create the background above.
We are going to start by making a new image. I'm going to keep mine
small for the sake of this tutorial. I made a new image 275x120 pixels.
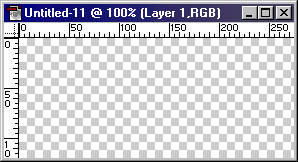 Now with the different marquee tools. I'm going to make some shapes
on my canvas.
Now with the different marquee tools. I'm going to make some shapes
on my canvas.
  Now I'm going to switch to my channels pallet. It's on the panel
as your layers.
Now I'm going to switch to my channels pallet. It's on the panel
as your layers.
 As you can see in the animation above, I changed from my layers
pallet to my channels pallet and then filled the selection with
white. This is what I get.
As you can see in the animation above, I changed from my layers
pallet to my channels pallet and then filled the selection with
white. This is what I get.
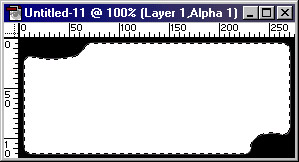
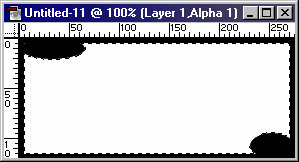 You can see from the image title that it says, layer 1, alpha 1.
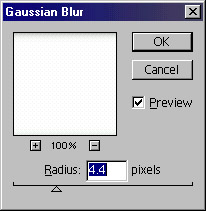
Now I have an alpha channel to work with. In order to get smooth
corners I need to blur the image first. At the top of your screen,
Choose Filter/Blur/Garrison Blur
You can see from the image title that it says, layer 1, alpha 1.
Now I have an alpha channel to work with. In order to get smooth
corners I need to blur the image first. At the top of your screen,
Choose Filter/Blur/Garrison Blur
  Once you've blurred your image, it's time to sharpen those edges.
So go now to image/adjust/levels This is the box that will come up.
Once you've blurred your image, it's time to sharpen those edges.
So go now to image/adjust/levels This is the box that will come up.
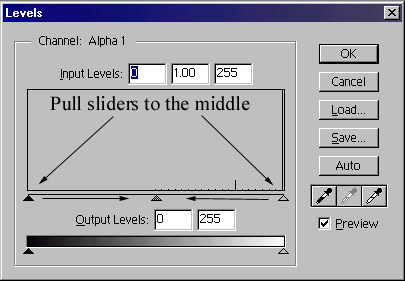 Here, you want to pull the sliders on the outside edges towards the
middle until you have a sharp crisp image. But don't over-do it to
the point where you can see black slices on the corners. This is what
you get after you adjust the levels.
Here, you want to pull the sliders on the outside edges towards the
middle until you have a sharp crisp image. But don't over-do it to
the point where you can see black slices on the corners. This is what
you get after you adjust the levels.
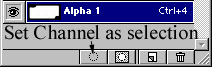
 There you have a Shape and alpha channel to create your background.
Now you use the select channel button.
There you have a Shape and alpha channel to create your background.
Now you use the select channel button.
  Switch back to your layers pallet and fill the selected area
with whatever you want. Be it a texture or just a solid color.
Switch back to your layers pallet and fill the selected area
with whatever you want. Be it a texture or just a solid color.
 I filled mine with green.
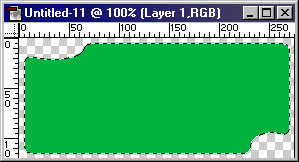 There you have it !!! A freeform background for your interface.
Now is the time to discuss how these channels relate to Winamp 3
If you are on a 9x machine, meaning that you don't have Windows
2000 or Windows xp, it is impossible to alpha blend your background
to the desktop. I have manipulated the alpha channels and discovered
that anything less then solid white disappears.
The way this works is that anything that is white is visible,
while anything that is black in the alpha channel is transparent.
Unless you have Windows 2000/Xp
But this only applies to your background. Any layer built on
top of your background supports alpha blending. The way that the
alpha blending works is by the written hierarchy in your xml code.
In other words, Starting from the bottom layer that is your
background. If you have two layers that are alpha blended, the layer
coded in your xml last will be on top of the layer coded before it
in your layout. And so on and so forth.
Now a word about saving to a png format in photoshop.
Heres a screenshot of the saving box.
There you have it !!! A freeform background for your interface.
Now is the time to discuss how these channels relate to Winamp 3
If you are on a 9x machine, meaning that you don't have Windows
2000 or Windows xp, it is impossible to alpha blend your background
to the desktop. I have manipulated the alpha channels and discovered
that anything less then solid white disappears.
The way this works is that anything that is white is visible,
while anything that is black in the alpha channel is transparent.
Unless you have Windows 2000/Xp
But this only applies to your background. Any layer built on
top of your background supports alpha blending. The way that the
alpha blending works is by the written hierarchy in your xml code.
In other words, Starting from the bottom layer that is your
background. If you have two layers that are alpha blended, the layer
coded in your xml last will be on top of the layer coded before it
in your layout. And so on and so forth.
Now a word about saving to a png format in photoshop.
Heres a screenshot of the saving box.
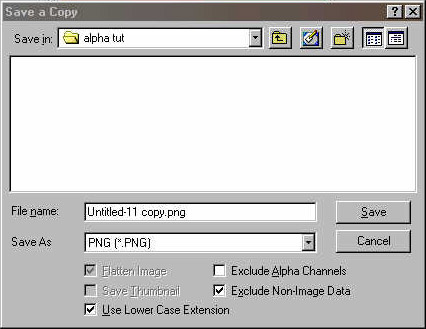 The first thing you will notice is that the "flatten image" box
is checked by default. You cannot save layers from psd to png.
Next, you will notice that the exclude alpha channels is unchecked.
But, if you have more then one alpha channel, it will check this
box by default and won't save your alpha channel until you delete
all but one channel.
Thats about all on alpha channels in Photoshop. I'm in the process
of creating a short tutorial on how to make buttons look like they
are being pressed in the middle, like the ones on my skin "Simplicity"
Cheers and happy skinning
Also, we are in great need of a tutorial on alpha
channels in "Paintshop Pro" I don't have or use the
program. So if you use it and would like to create
a tutorial of this nature, please contact me.
The first thing you will notice is that the "flatten image" box
is checked by default. You cannot save layers from psd to png.
Next, you will notice that the exclude alpha channels is unchecked.
But, if you have more then one alpha channel, it will check this
box by default and won't save your alpha channel until you delete
all but one channel.
Thats about all on alpha channels in Photoshop. I'm in the process
of creating a short tutorial on how to make buttons look like they
are being pressed in the middle, like the ones on my skin "Simplicity"
Cheers and happy skinning
Also, we are in great need of a tutorial on alpha
channels in "Paintshop Pro" I don't have or use the
program. So if you use it and would like to create
a tutorial of this nature, please contact me.
|